Create Wall
To ensure proper operation and accurate vector detection, this function must be used entirely in 2D view (the system will automatically switch to 2D view when entering this mode)
Steps
1.Click Create Wall![]() button to open the dialog box:
button to open the dialog box:
2.Use the left mouse button to click sequentially on the horizontal section of the point cloud as needed to create walls.
3.Auxiliary display information: During the wall vector creation process, the system will continuously evaluate relationships with other vectors that are visible within the current window and belong to other floor plan layers, generating key auxiliary measurement information.
Mainly includes:
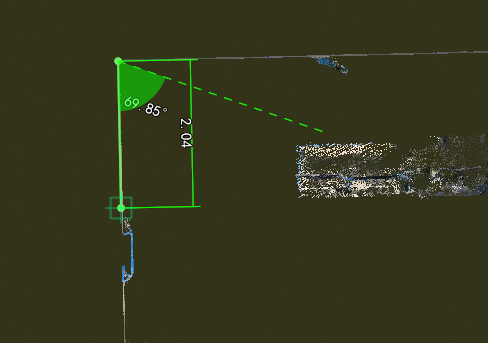
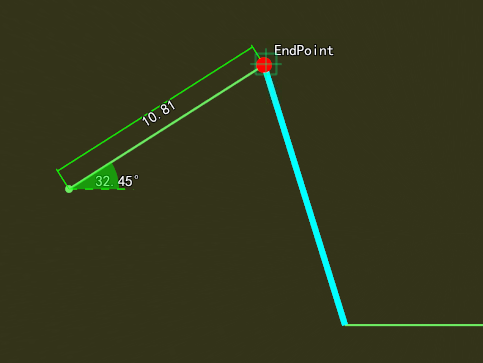
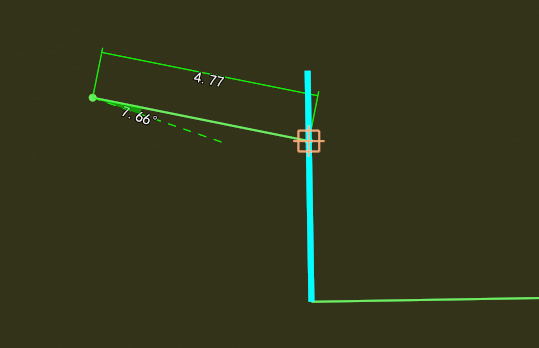
1.First priority: Angle with the horizontal line, current segment length
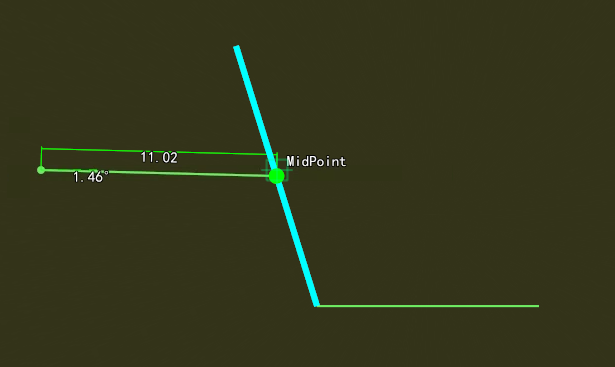
 2.Second priority: Endpoints and midpoints (i.e., whether the current cursor point coincides with endpoints or midpoints of other lines)
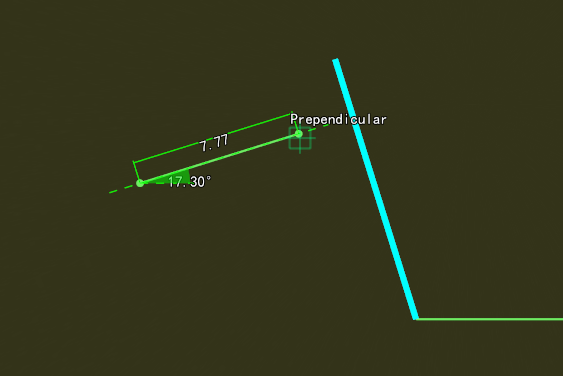
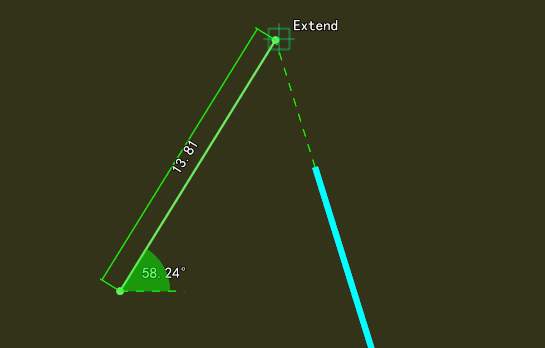
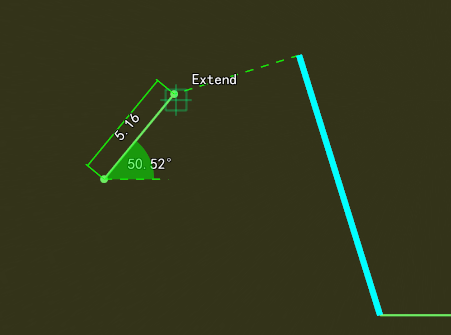
3.Third priority: Whether the current cursor point lies on other lines, extension lines, or perpendicular extension lines (Note: perpendicular extension checks are only applied at the endpoints of other lines)
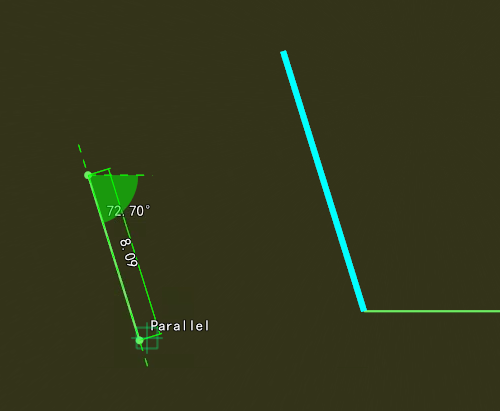
4.Fourth priority: Whether the current line segment is perpendicular or parallel to other lines