Rough Registration - Vector Layer Rotation & Translation
Function Description: Manually perform rough registration by rotating and translating the vector layer to be registered to match the reference point cloud or reference vector layer.
Data Preparation
- Double-click the Vector Registration button in the toolbox:
Toolbox -> Data Management -> Point Cloud Tools -> Registration Toolbox, as shown below:
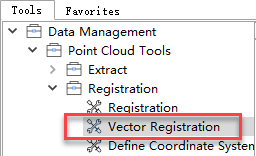
Registration Toolbox Entry Point
After double-clicking, the data preparation interface for the registration function will open, as shown below:
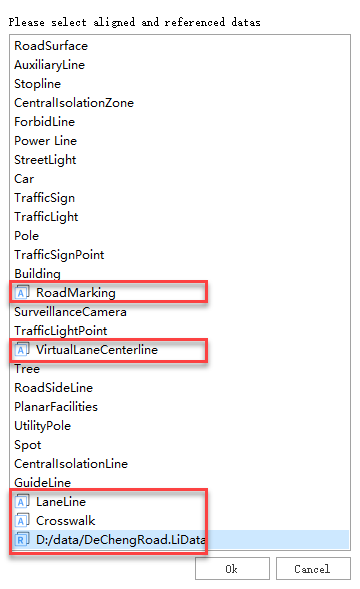
Registration Data Preparation
On the page above, select the data to be registered and the reference data.
- Vector Layer Data: Initially, each data entry has no label. Clicking on a vector data entry will mark it with an
Aicon, indicating it is selected as the data to be registered. Clicking again changes the label toR, marking it as reference data. A third click removes the label, excluding it from the registration operation. - Point Cloud Data: Clicking on a point cloud data entry will mark it with an
Ricon, indicating it is selected as reference data. Clicking again removes the label, excluding it from the operation.
After selecting the data to be registered and the reference data, click OK. The selected data will be displayed in the registration window. Clicking Cancel will exit the registration function.
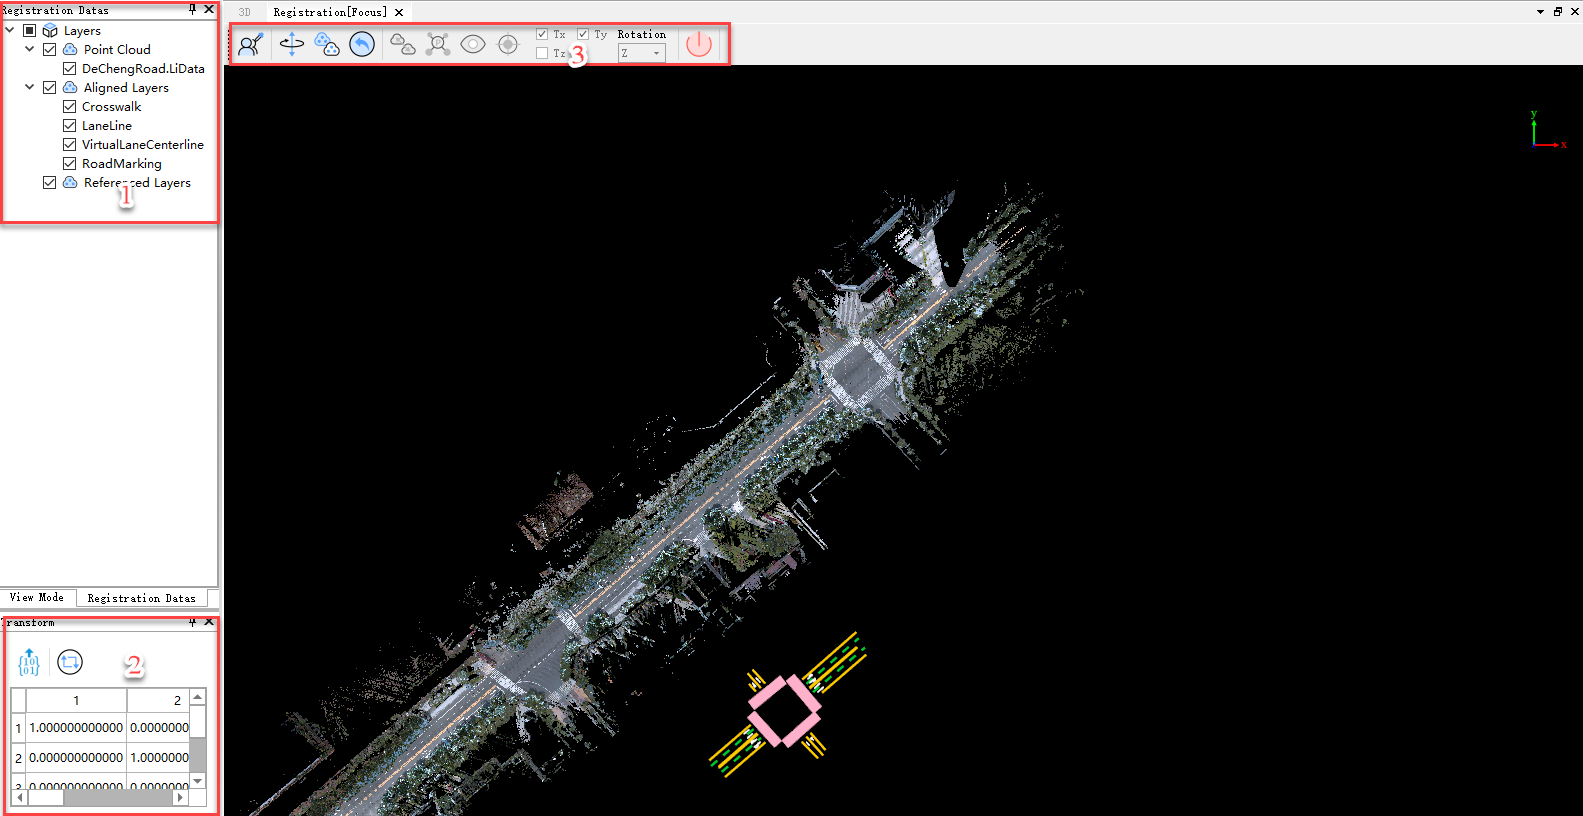
Loaded Registration Data
- Upon entering the registration function, the program automatically creates a new registration window with a toolbar for loading data and performing registration operations (marked as 3 in the figure above).
- The data loaded into the registration window is displayed in a newly created directory tree (marked as 1), similar to the main directory tree, supporting right-click tools like Zoom to Layer and Delete.
- The point cloud transformation matrix window at the bottom left (marked as 2) displays the transformation matrix of the registered vector layer relative to its initial position in real-time.
Rotation & Translation
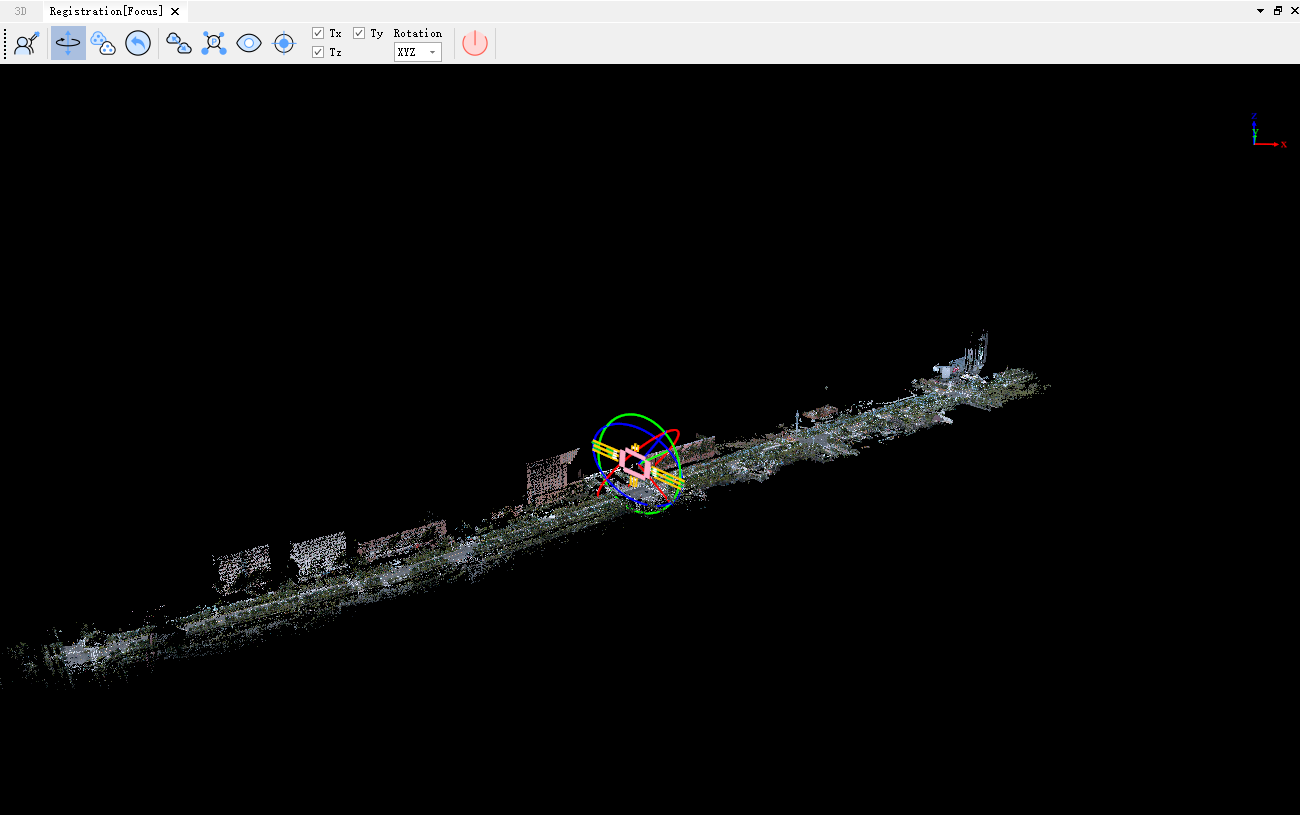
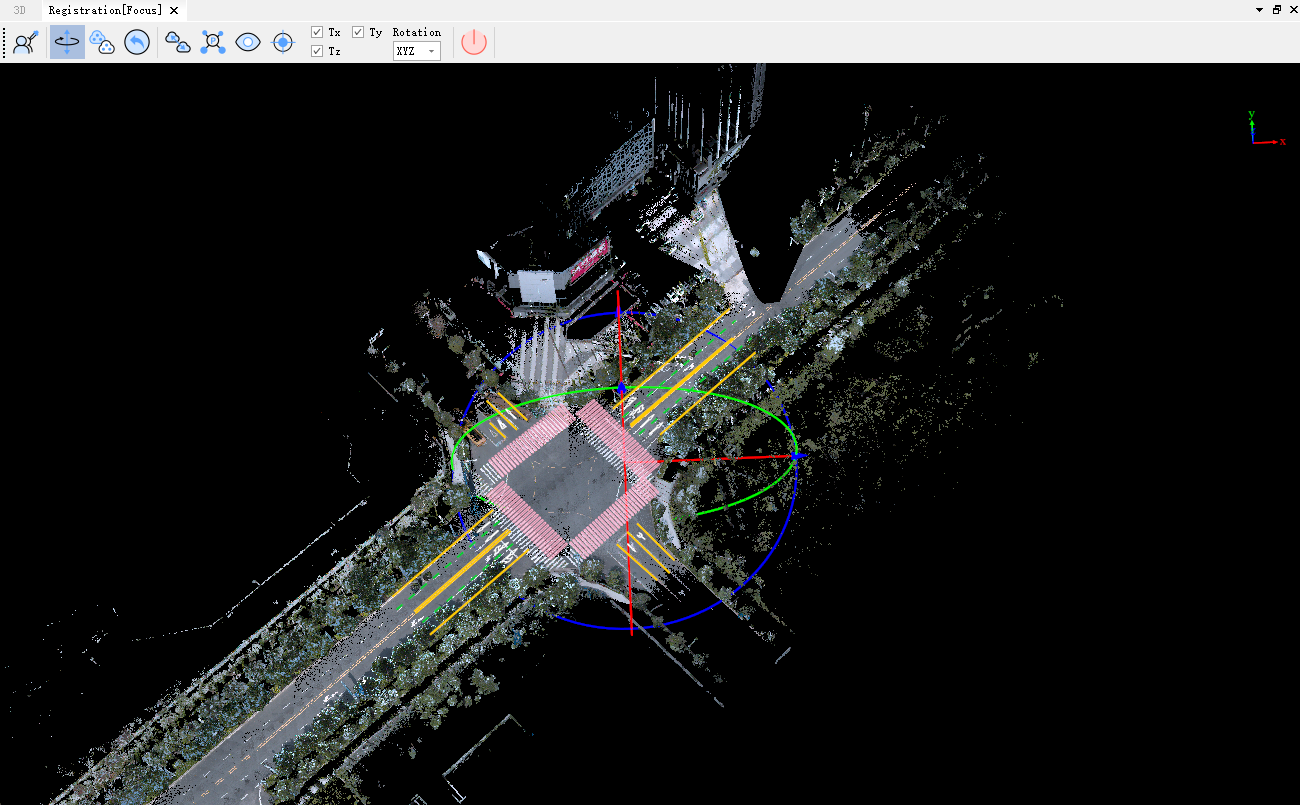
- Click the Vector Rotation & Translation button in the registration window toolbar. The layer to be registered will display an interactive coordinate axis (for translation) and interactive rings (for rotation), as shown at marker 1 below. A docked window showing detailed rotation/translation information will appear on the right side of the interface.

Vector Layer Rotation & Translation
- Left-click and drag to freely rotate the vector layer to be registered.
- Right-click and drag to freely move the vector layer to be registered.
- Snap to an axis (X, Y, Z) on the auxiliary coordinate system. The selected axis turns yellow. Left-click and drag to move the vector layer along that axis.
- Snap to a rotation ring. The selected ring turns yellow. Left-click and drag to rotate the vector layer around the corresponding axis (X, Y, or Z).
While interactively rotating and translating in the registration window, the docked window on the right (marker 3) displays the current translation distances along the XYZ axes and rotation angles around the XYZ axes in real-time. The Data To Be Registered dropdown in this window allows you to select which vector layer(s) to operate on, supporting simultaneous rotation/translation of one or multiple layers. The transformation matrix at the bottom left (marker 2) also updates in real-time.
- To restore the vector layer to its original state after rotation/translation, click the Restore button on the toolbar.

Restore
- If the reference data and the vector layer to be registered are far apart, click the Match Center button on the toolbar. This moves the bounding box center of the data to be registered to the bounding box center of the reference data.

Match Center
Match Center Result
- If the bounding box center match is not accurate enough, use the Select Matching Center Points tool on the toolbar.

Select Matching Center Points
- Select a center point on both the reference data and the vector layer to be registered.
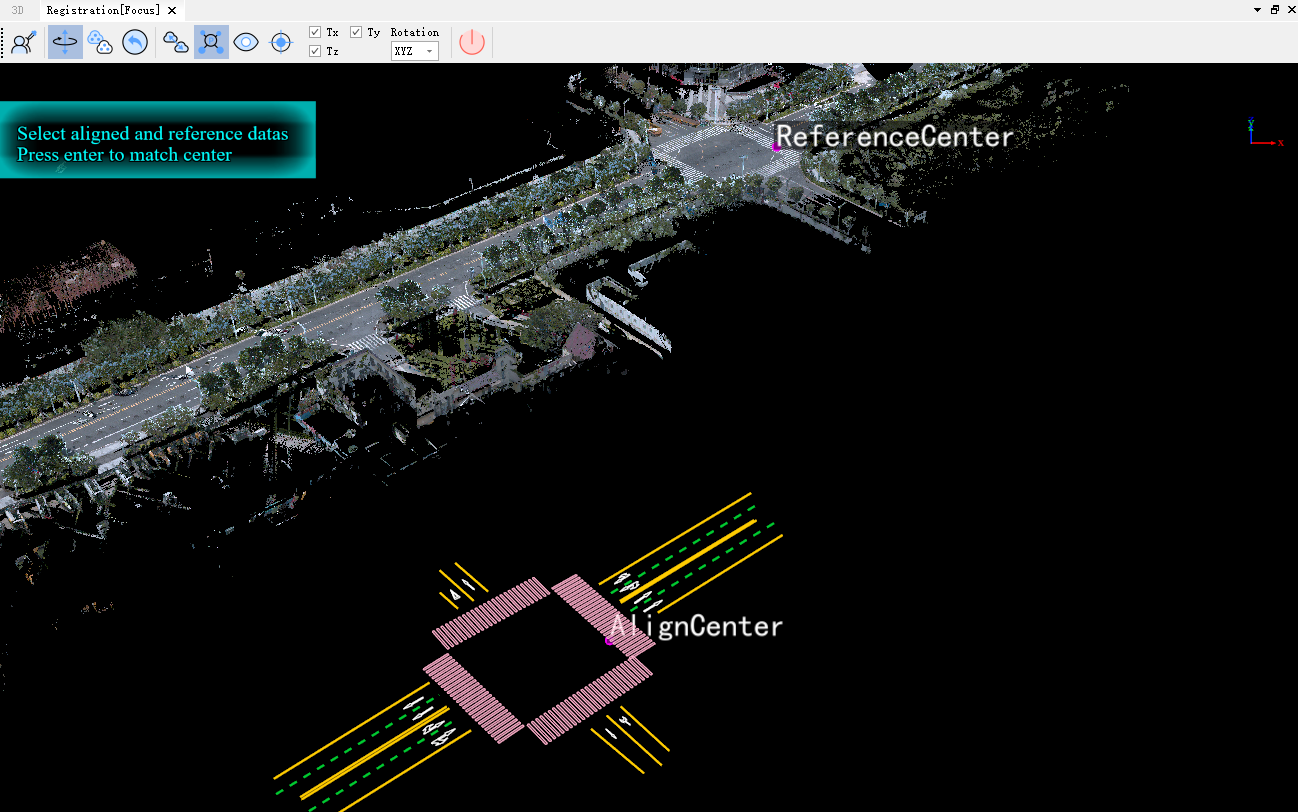
Selecting Matching Center Points
- After selecting both points, press Enter. The vector layer to be registered will move, aligning its selected center point with the selected center point on the reference data.
Result of Selecting Matching Center Points
- To switch the view for a detailed inspection of the match between the reference data and the vector layer during rotation/translation, click the Viewport button. This hides the auxiliary rings and coordinate system. Left-click and right-click will then control the scene view instead of performing rotation/translation.

Viewport
- If the automatically calculated rotation center for the vector layer is inconvenient or inaccurate, use the Rotation Center function.

Rotation Center
This opens the rotation center settings window.
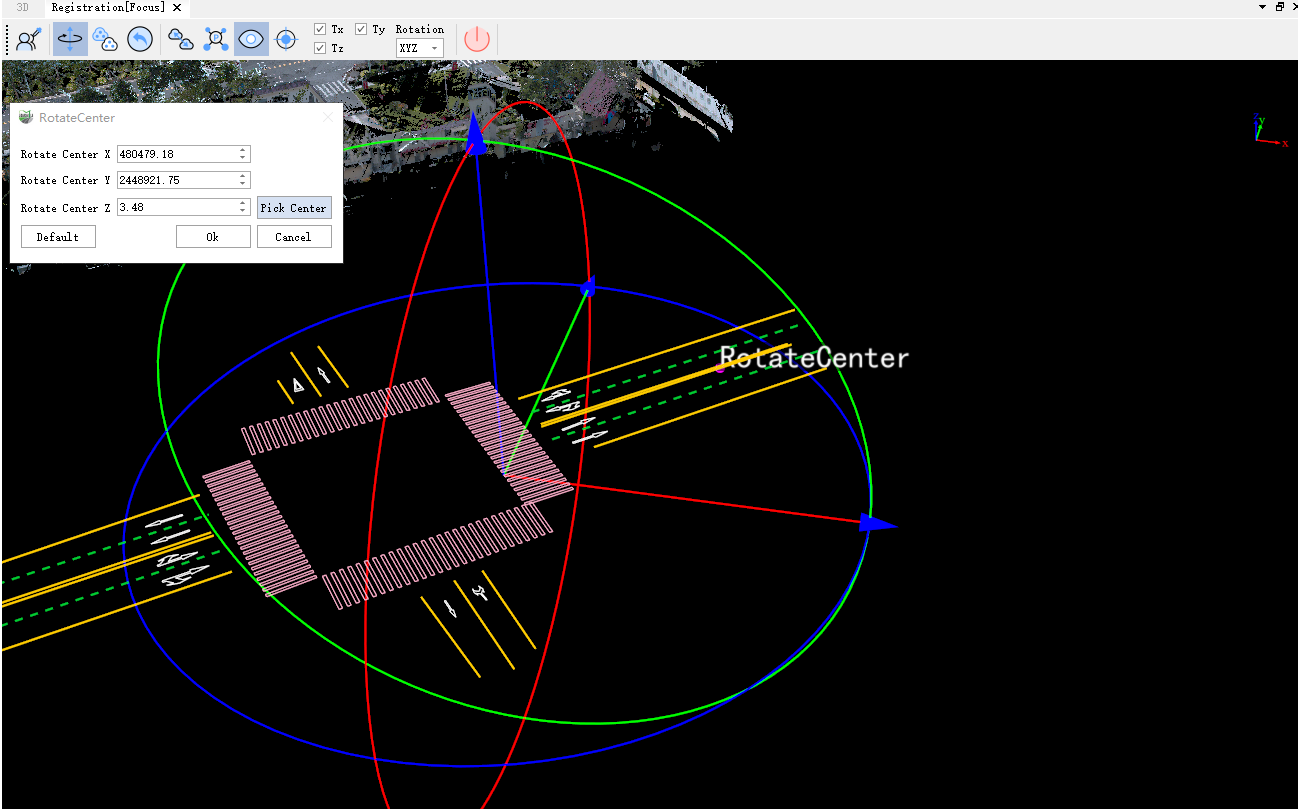
Select Rotation Center
In this window, you can set the rotation center by:
- Directly entering coordinates.
- Adjusting the coordinate values using the controls.
- Clicking the Select Rotation Center button and then clicking a desired point on the reference data.
After setting or selecting the rotation center, click Confirm. The vector layer to be registered will now rotate around the new center.

Selecting a New Rotation Center
To restore the original rotation center, click the Reset button in the rotation center settings window, then click Confirm.
- To constrain the vector layer's movement to a specific direction or rotation to a specific axis, use the movement axis and rotation axis selection areas in the toolbar.

Specify Movement Direction and Rotation Axis
- After completing the rotation and translation, you can export the current transformation matrix.
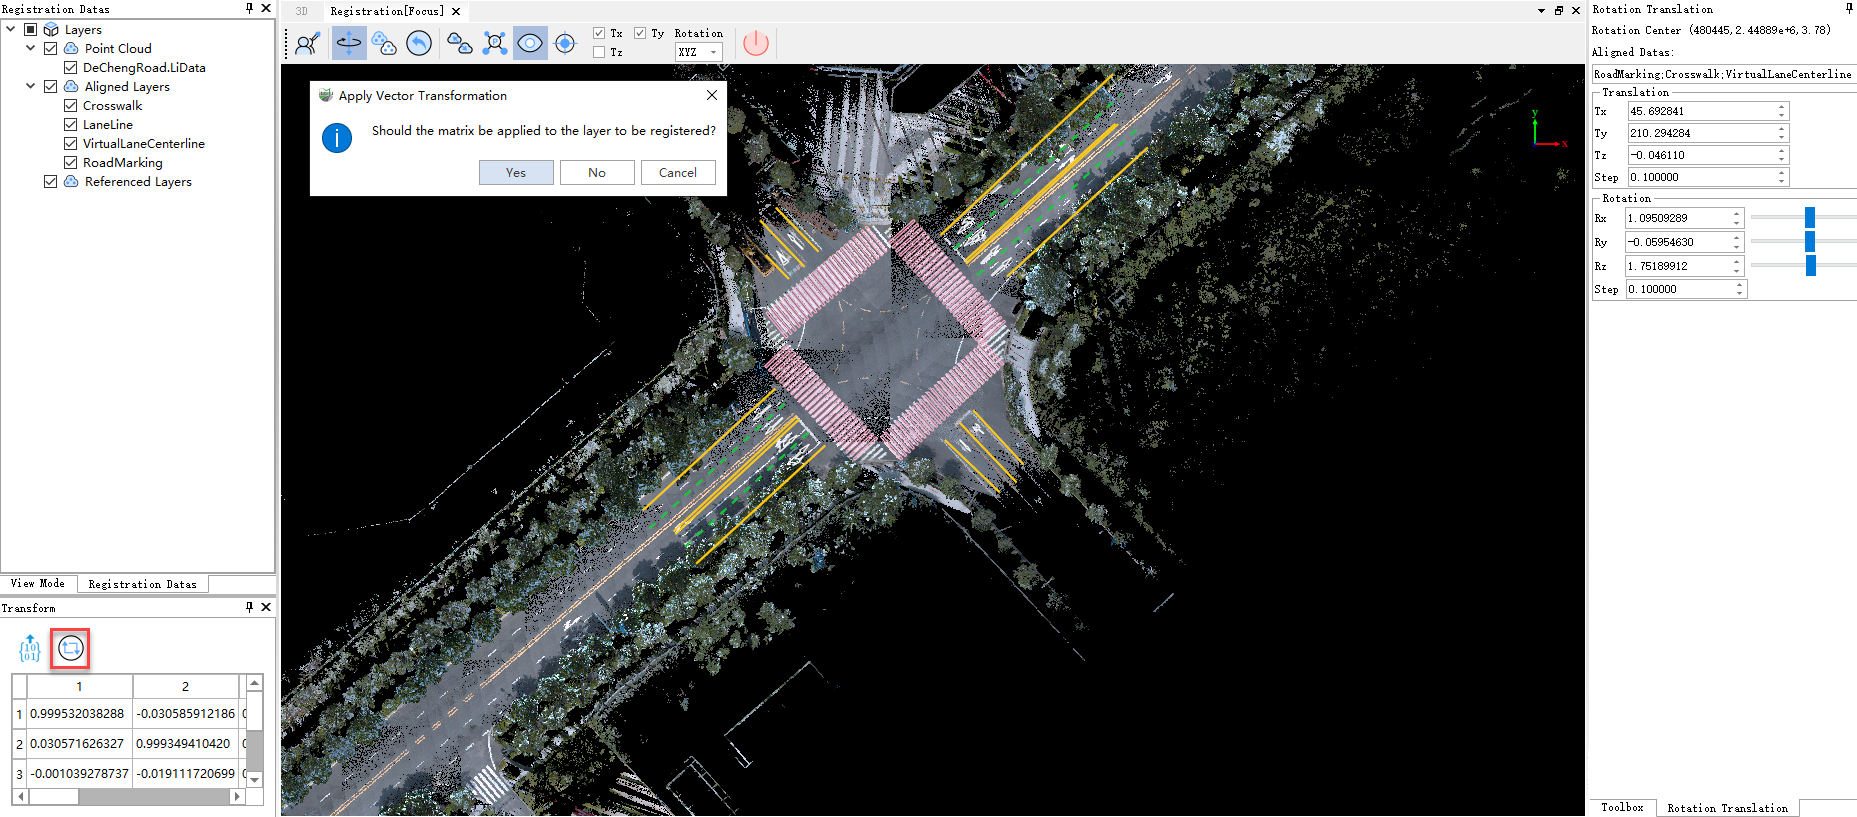
Apply Transformation
Click the Apply Transformation button. A confirmation dialog will appear (as shown above). Select Yes to apply the registration results to the target vector layer and save it to the database.