Trench Extraction
This feature is mainly for trenches excavated for power lines or residential water pipelines, typically less than 2 meters wide.
Steps
- Click the Trench Extraction
 button to open the dialog:
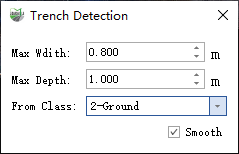
Parameter Dialog
Parameter Description:
- Maximum Width: Maximum width of trenches to detect. Default is 0.8 m. This function is mainly for trenches for power lines or residential water pipelines, generally within 2 meters.
- Maximum Depth: Maximum depth of trenches to detect. Default is 1.0 m.
- From Class: Specify the category of point cloud points to be used in the calculation.
- Smooth: Checked by default. If enabled, the results after detection stop will be smoothed once.
| Shortcut Key | Function |
|---|---|
| Space | Interrupt growth |
| Enter | Confirm growth result |
| C | Switch drawing mode |
| H | Toggle top-left hints on/off |
| Current Mode | Displays the current drawing mode |
| Right Mouse Button | Undo node (only works after interruption; ineffective during growth) |
The trench extraction feature offers two modes:
- Semi-automatic mode: Automatically detect the trench using a start point + direction approach.
- Manual mode: Draw the trench manually by clicking key points. You can switch between modes anytime during drawing using C.
- The initial drawing mode is Semi-automatic. Left-click a point on the trench point cloud as the start point, then left-click another point to specify the growth direction.
- The program will automatically extract the trench along the selected direction from the start point.
During growth, the screen center automatically follows the currently generated point. You can also use left-click, right-click, and mouse wheel to adjust the point cloud angle, drag, and zoom for better viewing.
Use shortcut keys for real-time shape adjustment:
Due to sudden intensity changes, actual termination, or interruption, the program may automatically interrupt. If growth is incorrect, press Space to manually interrupt.
- After interruption, use Right-click to undo nodes and adjust the shape.
- After interruption, repeat steps 3–4 to continue automatic growth.
If the point cloud is severely missing or the geometry changes drastically, automatic detection may fail. Switch to Manual Mode with C and draw by clicking key points. Double-click to finish manual drawing or press C to return to automatic mode.
Once growth (or drawing) is complete and the shape is acceptable, press Enter in automatic mode to confirm the current trench line.
Trench Line
- Selecting Start and Direction Points
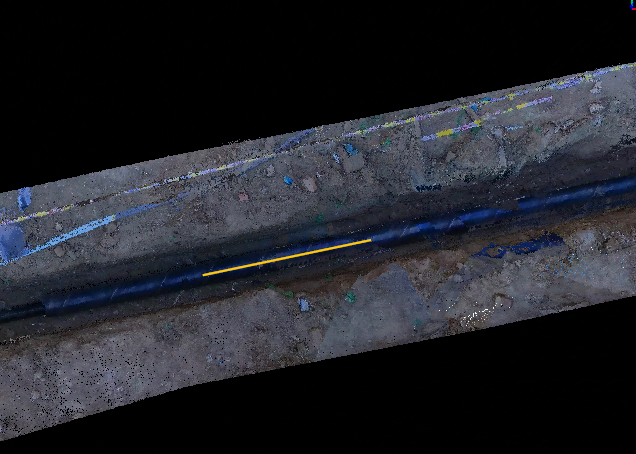
Select Start and Direction Points
- Growth Result
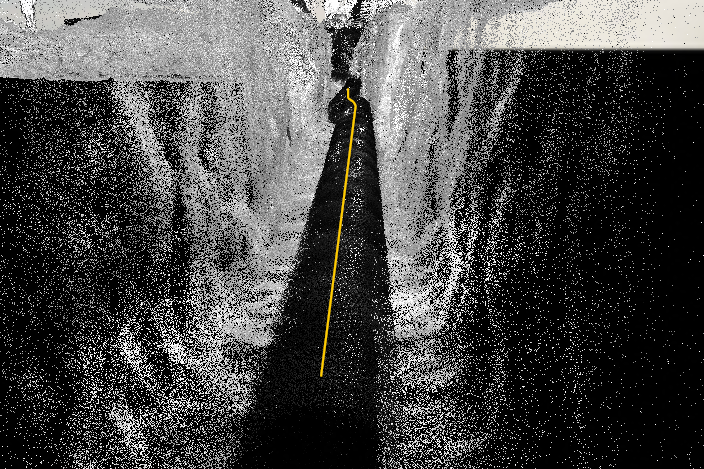
Trench Growth Result