COLMAP Data Gaussian Reconstruction Workflow
Steps:
1.Switch to the GSReconstruction page and click the General button to start the reconstruction process.
2.Input Settings
After clicking the reconstruction button, an input settings window will pop up, supporting both Internal and External modes for Gaussian reconstruction. The interface is shown in the figure below: (1) Internal Mode
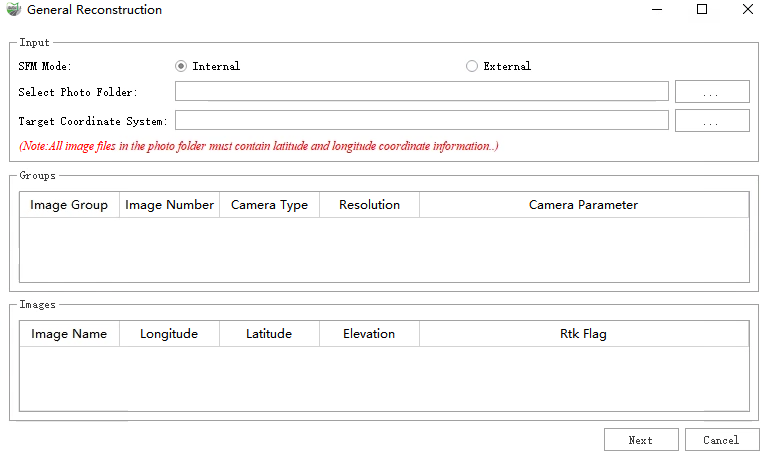
General Reconstruction
In Internal Mode, users can manually select a camera folder. The software will recursively scan for image files within this folder and group them by subfolder for display.

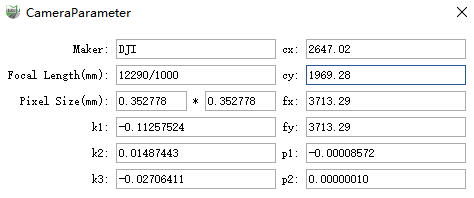
Click the "Camera Parameter" button to view detailed capture parameters for each image group.
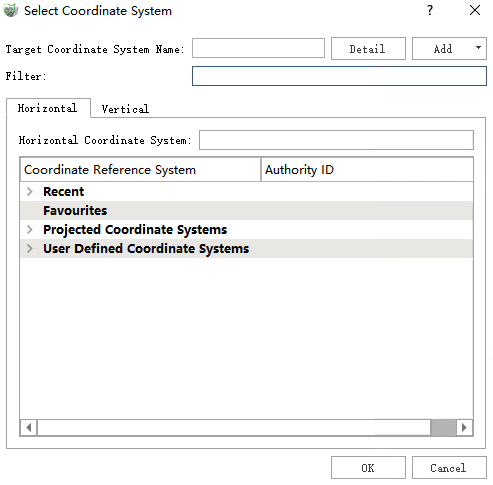
Use the "Target Coordinate System" button to set the coordinate system for the reconstruction results.
(2) External Mode
In External Mode, users need to manually configure the paths to relevant COLMAP output files for Gaussian reconstruction.
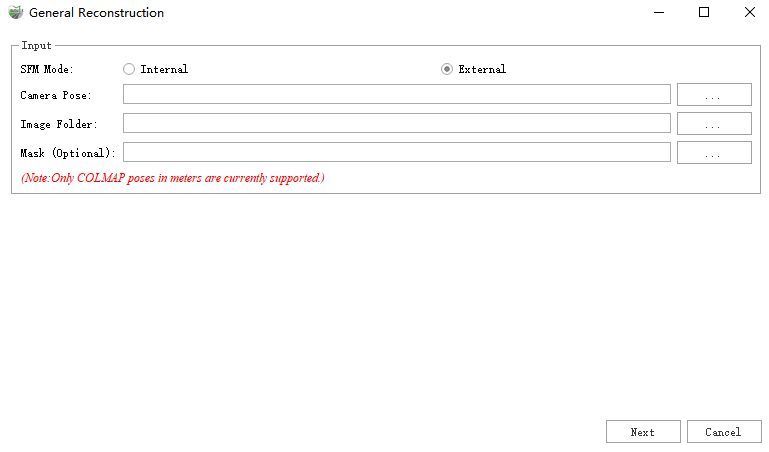
Parameter:
- Camera Pose: COLMAP data processed by software such as Metashape and RealityCapture must be named cameras.bin, images.bin, and points3D.bin (or identically named files with a
.txtextension), as well as BlocksExchange XML files exported by software such as ContextCapture. - image Set: Image data corresponding to camera poses.
- MaskOptional: Image data corresponding to camera poses.
2.Parameter Settings
After configuring the input files, click Next to switch to the parameters page. Users can adjust reconstruction settings here to optimize Gaussian reconstruction quality and speed. The interface is shown below:
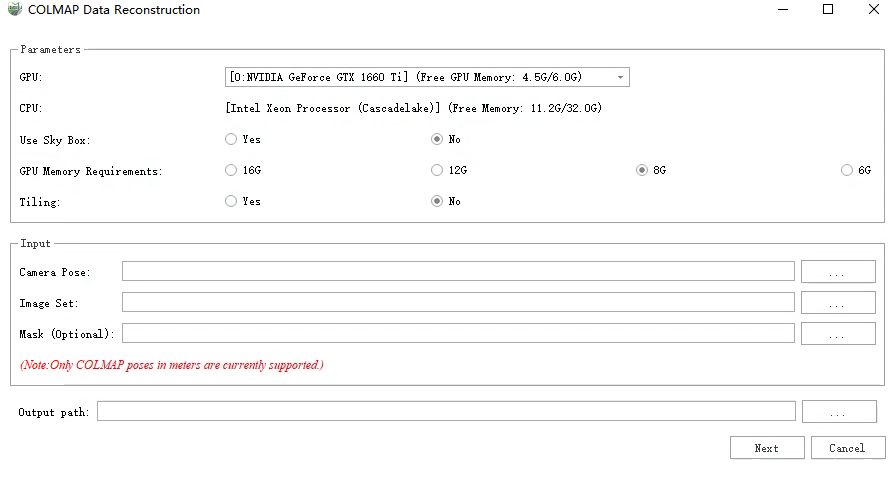
- GPU: Select the GPU to be used for Gaussian reconstruction. Currently, only single-GPU computation mode is supported.
- CPU: Displays the current CPU model and memory capacity of the system, allowing users to understand the system resource configuration.
- Use Sky Box: Outdoor data please select yes,Indoor data select no.
- Remaining GPU Memory: Specifies the remaining GPU memory required for the next reconstruction.
- Output path: Image data corresponding to camera poses
4.Start Reconstruction
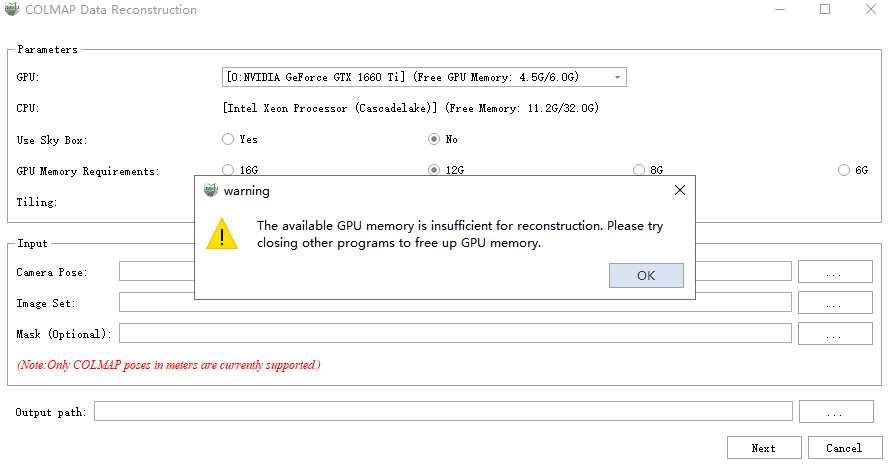
1)Click the "Next" → "Start" button to initiate the reconstruction function. The system will check the remaining available RAM and VRAM before launching reconstruction. If the available system memory is below 20GB, or if the selected GPU's available VRAM is lower than the minimum requirement specified in the parameter settings, Gaussian reconstruction cannot be executed.
2)If the system resources meet the reconstruction requirements, the system will start the reconstruction process. The log window and progress bar will display the current processing steps and overall progress in real time.
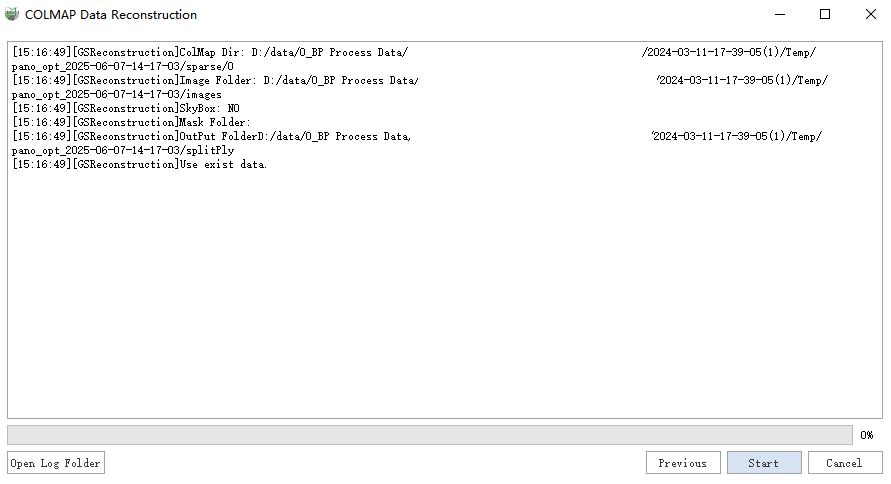
3)Click the "Open Log Folder" button to view the log records of all Gaussian reconstruction processes in the current project, allowing you to track and analyze the detailed information of each reconstruction.
4)Clicking the "Package Log" button will compress all Gaussian reconstruction logs from the current project into a ZIP file.
5)Clicking the "Stop" button will interrupt the current reconstruction process.
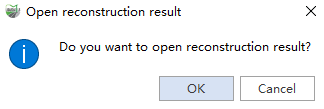
6)After the reconstruction is successful, the system will display a prompt window asking if you want to view the reconstruction results immediately. Clicking "Yes" will open the generated reconstruction model, allowing you to browse and validate the model.
Note: During the reconstruction process, the generated point cloud slice files and log files are automatically saved to the current project's Temp and Log directories. For example,
0_1.plyis saved as the point cloud slice file, andReconstruction_2024-10-21-13-50-03_LiDAR360MLS.logis saved as the log file for the inference process.