Registration Based on Homologous Point Pairs
Function Description: Perform rough registration by manually selecting homologous point pairs.
Data Preparation
1. Double-click the Vector Registration button in the toolbox: Toolbox -> Data Management -> Point Cloud Tools -> Registration Toolbox, as shown below:
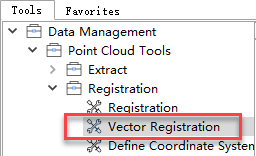
Registration Toolbox Entry Point
After double-clicking, the data preparation interface for the registration function will open:
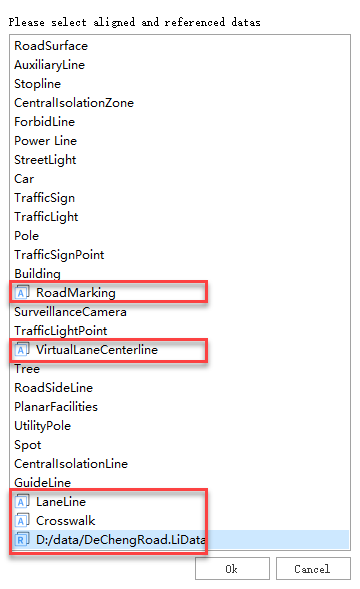
Registration Data Preparation
On the page above, select the data to be registered and the reference data.
- Vector Layer Data: Initially, each data entry has no label. Clicking on a vector data entry will mark it with an
Aicon, indicating it is selected as the data to be registered. Clicking again changes the label toR, marking it as reference data. A third click removes the label, excluding it from the registration operation. - Point Cloud Data: Clicking on a point cloud data entry will mark it with an
Ricon, indicating it is selected as reference data. Clicking again removes the label, excluding it from the operation.
After selecting the data to be registered and the reference data, click OK. The selected data will be displayed in the registration window. Clicking Cancel will exit the registration function.
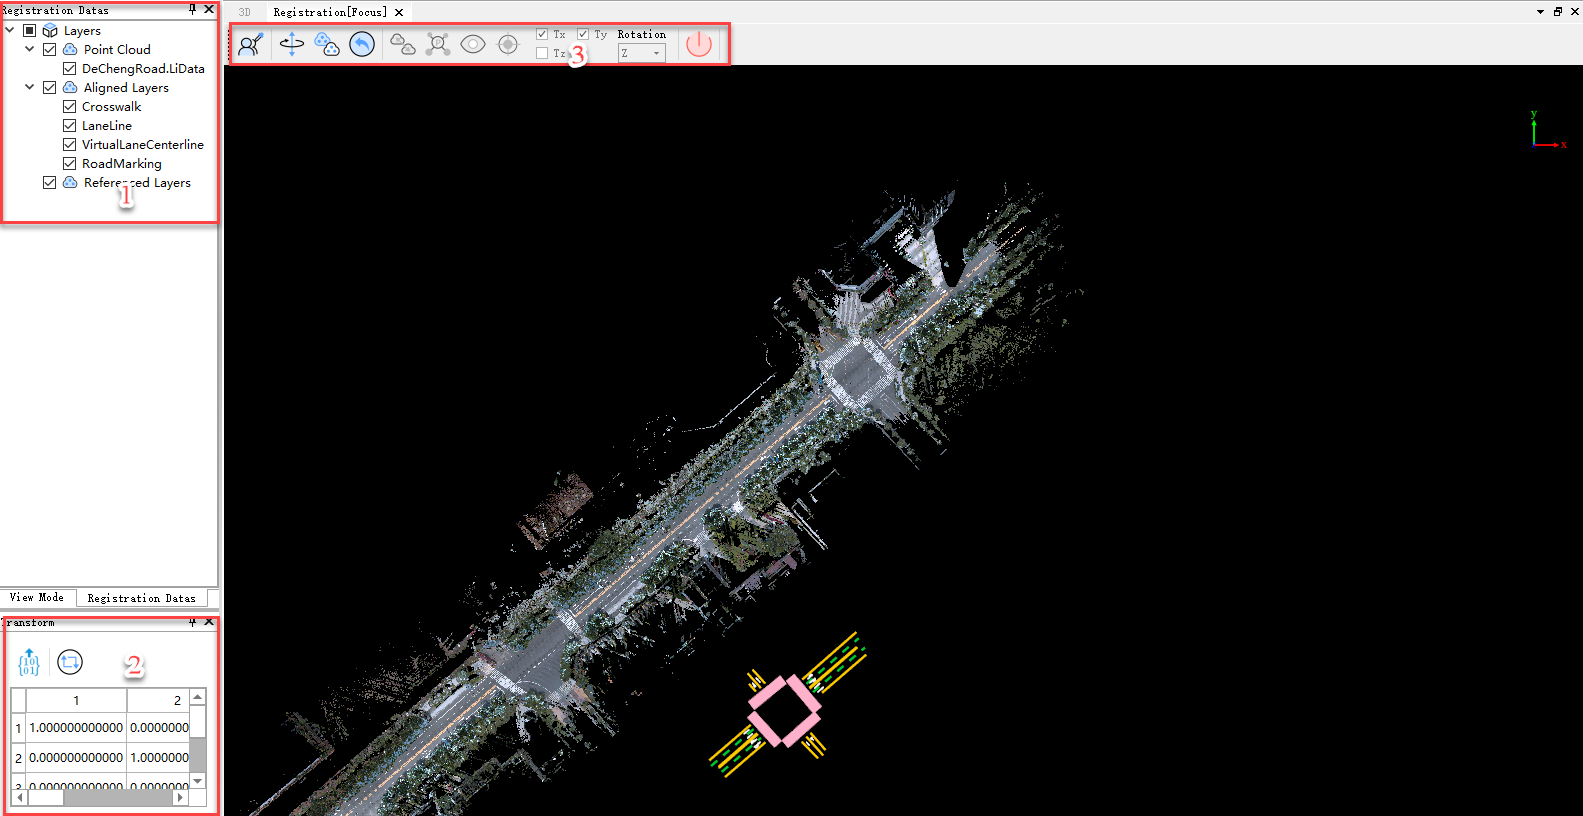
Loaded Registration Data
- Upon entering the registration function, the program automatically creates a new registration window with a toolbar for loading data and performing registration operations (marked as 3 in the figure above).
- The data loaded into the registration window is displayed in a newly created directory tree (marked as 1), similar to the main directory tree, supporting right-click tools like Zoom to Layer and Delete.
- The point cloud transformation matrix window at the bottom left (marked as 2) displays the transformation matrix of the registered vector layer relative to its initial position in real-time.
Point Pair Function
After performing rough registration on the layer to be registered, click the Point Pairs ![]() button. The homologous point pair registration window and transformation window will appear. Homologous point pairs can be obtained through external import or manual selection.
button. The homologous point pair registration window and transformation window will appear. Homologous point pairs can be obtained through external import or manual selection.
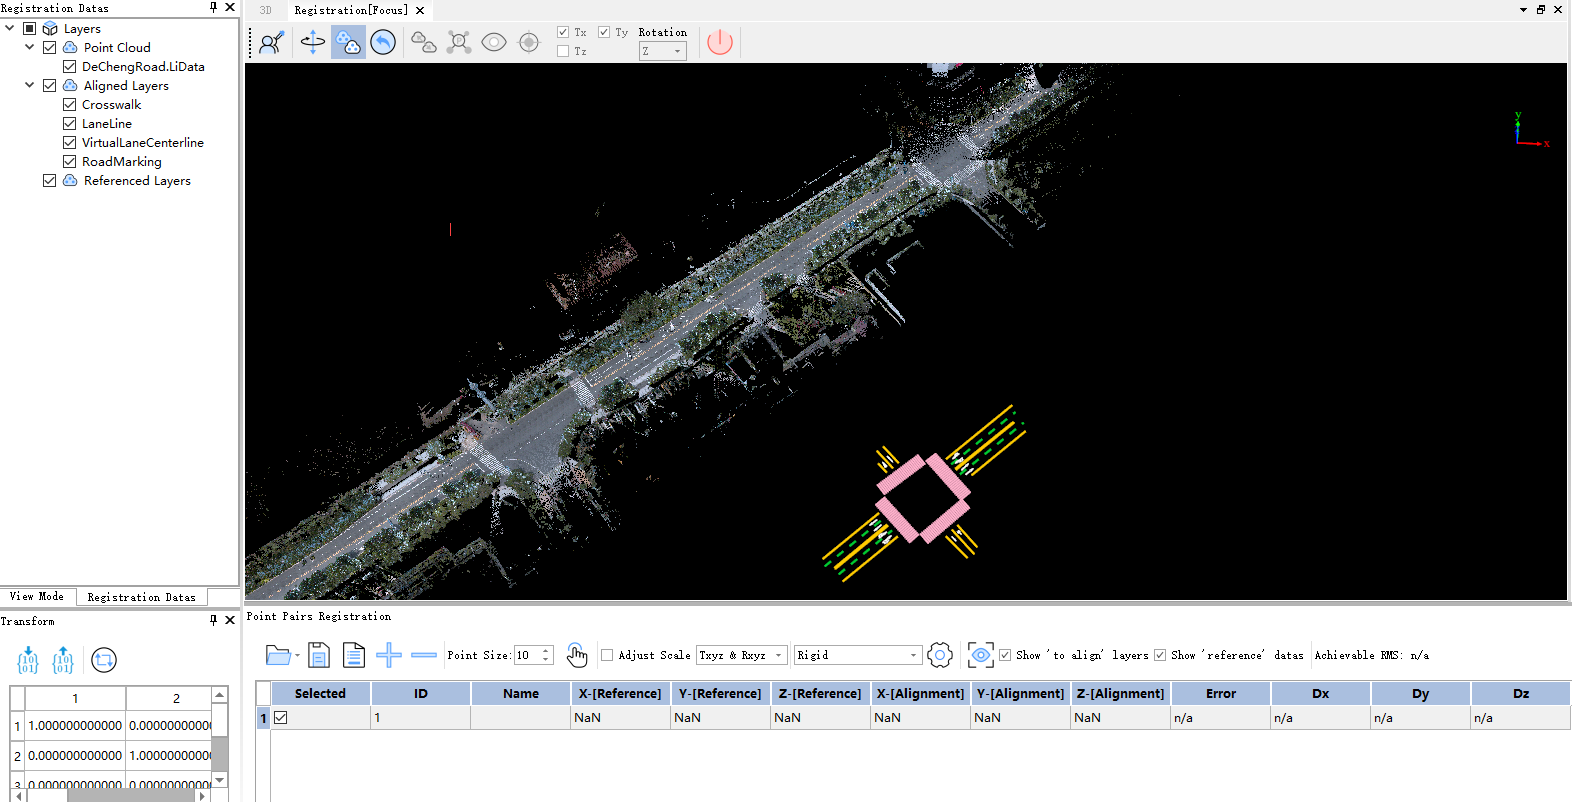
Point Pair Function Interface
1. Click the Load Points ![]() button to import a *.txt format homologous point pair file. It is recommended to use the
button to import a *.txt format homologous point pair file. It is recommended to use the geotag.txt file generated by LiBackpack equipment and edit it manually. The text format is as follows:
name, align_x, align_y, align_z, ref_x, ref_y, ref_z
The text is divided into 6 columns:
- name: Point pair name
- align_x, align_y, align_z: Coordinates of the registration point (valid values already exist in the
geotag.txtfile) - ref_x, ref_y, ref_z: Coordinates of the corresponding reference point (requires manual editing)
Note: When using LiBackpack equipment to collect data, setting tags for points of interest automatically saves the tag coordinates to the
geotag.txtfile (columnsalign_x,align_y,align_z). After data collection, the geographic coordinates corresponding to these tags must be manually added to thegeotag.txtfile (columnsref_x,ref_y,ref_z). Finally, import thegeotag.txtfile into LiFuser-BP for registration.
2. Click the ![]() button in the transformation window to perform data transformation. In the pop-up window, select Yes to apply the registration results to the target layer and save it to the database.
button in the transformation window to perform data transformation. In the pop-up window, select Yes to apply the registration results to the target layer and save it to the database.
Manual Selection of Homologous Point Pairs
1. Click ![]() to select distinctive homologous point pairs on the layer to be registered and the reference data respectively. If the data occludes each other and affects point selection, you can display the corresponding data individually using the checkboxes in front of the data in the directory tree.
to select distinctive homologous point pairs on the layer to be registered and the reference data respectively. If the data occludes each other and affects point selection, you can display the corresponding data individually using the checkboxes in front of the data in the directory tree.
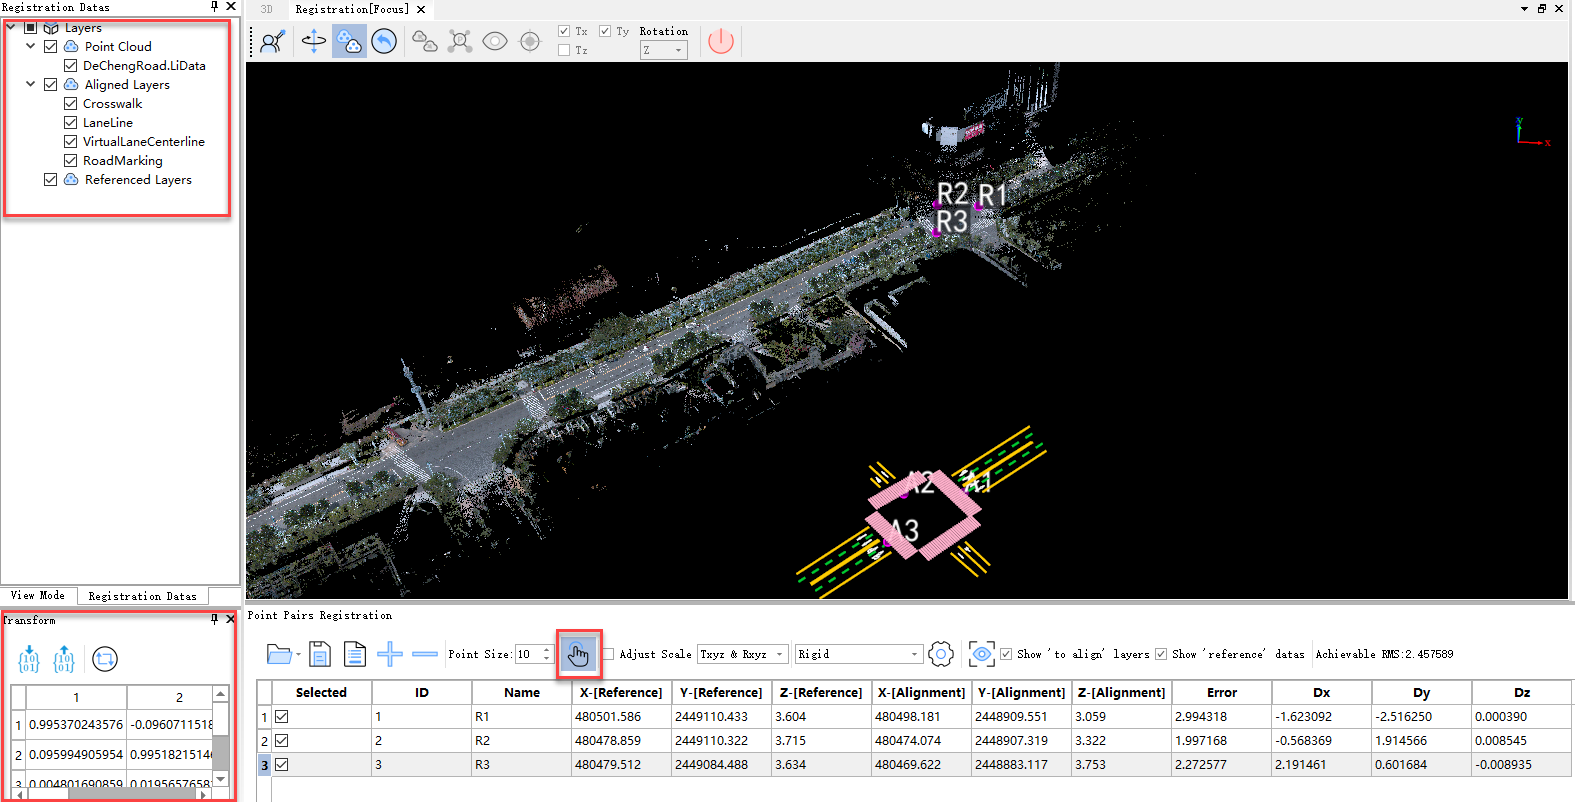
Point Pair Selection
2. Click the ![]() button to add a new row, then repeat step 1 to select homologous point pairs.
button to add a new row, then repeat step 1 to select homologous point pairs.
3. Repeat steps 1 and 2 to select at least 3 pairs of homologous points. When the number of homologous point pairs exceeds 3, the registration error will be displayed in the table. Click the ![]() button to preview the registration result.
button to preview the registration result.

Point Pair Registration
4. Click the ![]() button in the transformation window to perform data transformation. In the pop-up window, select Yes to apply the registration results to the target layer and save it to the database.
button in the transformation window to perform data transformation. In the pop-up window, select Yes to apply the registration results to the target layer and save it to the database.