Point Pairs Registration
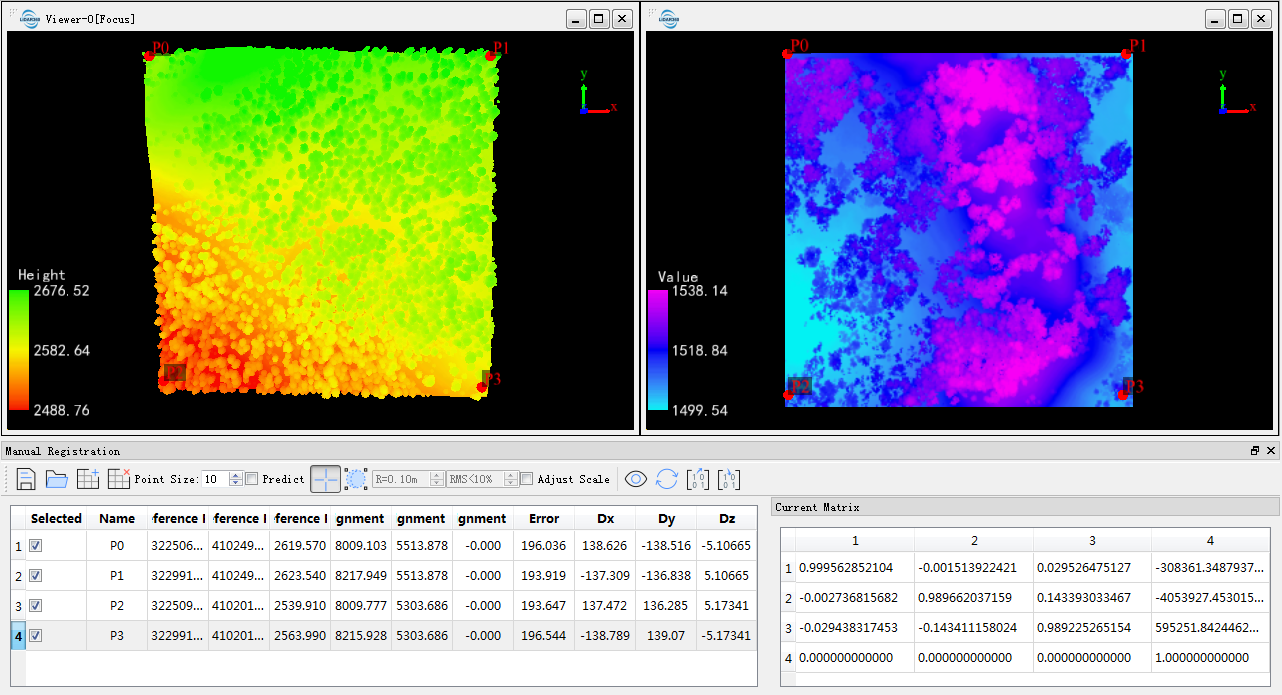
The point-to-point registration tool can be used for data correction between point clouds, images, and model data. Click the "Point-to-Point Registration (R2)" button to enter the registration tool. The main view is split into three sections: the top-left view contains reference data, the top-right view contains data to be registered, and the bottom view shows a preview of the registration results. Simultaneously, a manual point selection toolbar appears in the upper-right section of the software.
Point Pair Registration by Reference Files
Select or fit spheres (for point cloud data) in two windows to obtain at least three pairs of corresponding points. These corresponding points are used to calculate the coordinate transformation matrix between the two datasets for coordinate correction. By selecting point pairs, the user can view the residuals between the datasets in the corresponding point pairs list.
(Optional) Users can click Open Data to load known corresponding points from external sources, thus skipping steps 4, 5, and 6.
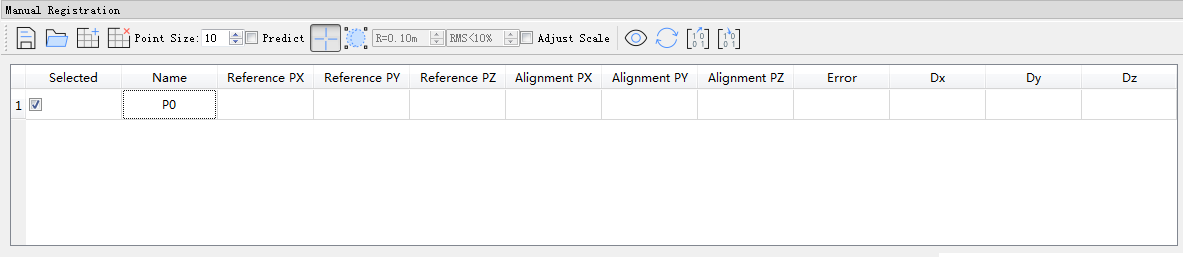
- Click Select Corresponding Points or Select Target Sphere to select a point as the corresponding point in both the reference and registration windows.
- After selecting a pair of corresponding points, click the Add Row button to add an empty row.
- Repeat steps 3 and 4 to select at least three pairs of corresponding points.
- (Optional) If a certain pair of corresponding points is not needed for coordinate transformation, there are two ways to achieve this: (1) Uncheck the row in the list; (2) Click Delete Corresponding Points to remove point pairs with large residuals.
- (Optional) If the residual of a pair of corresponding points is large or if you want to correct the coordinates of the point pair, there are two ways to achieve this: (1) Select the corresponding point pair in the list and reselect the point in either the reference or registration window; (2) Double-click the coordinate value you want to modify and edit it directly.
- (Optional) To view a particular pair of corresponding points, double-click the pair in the list to center it in the window.
- (Optional) Click Save Data to save the selected corresponding points.
Registration Steps Using Control Points as Reference
Click
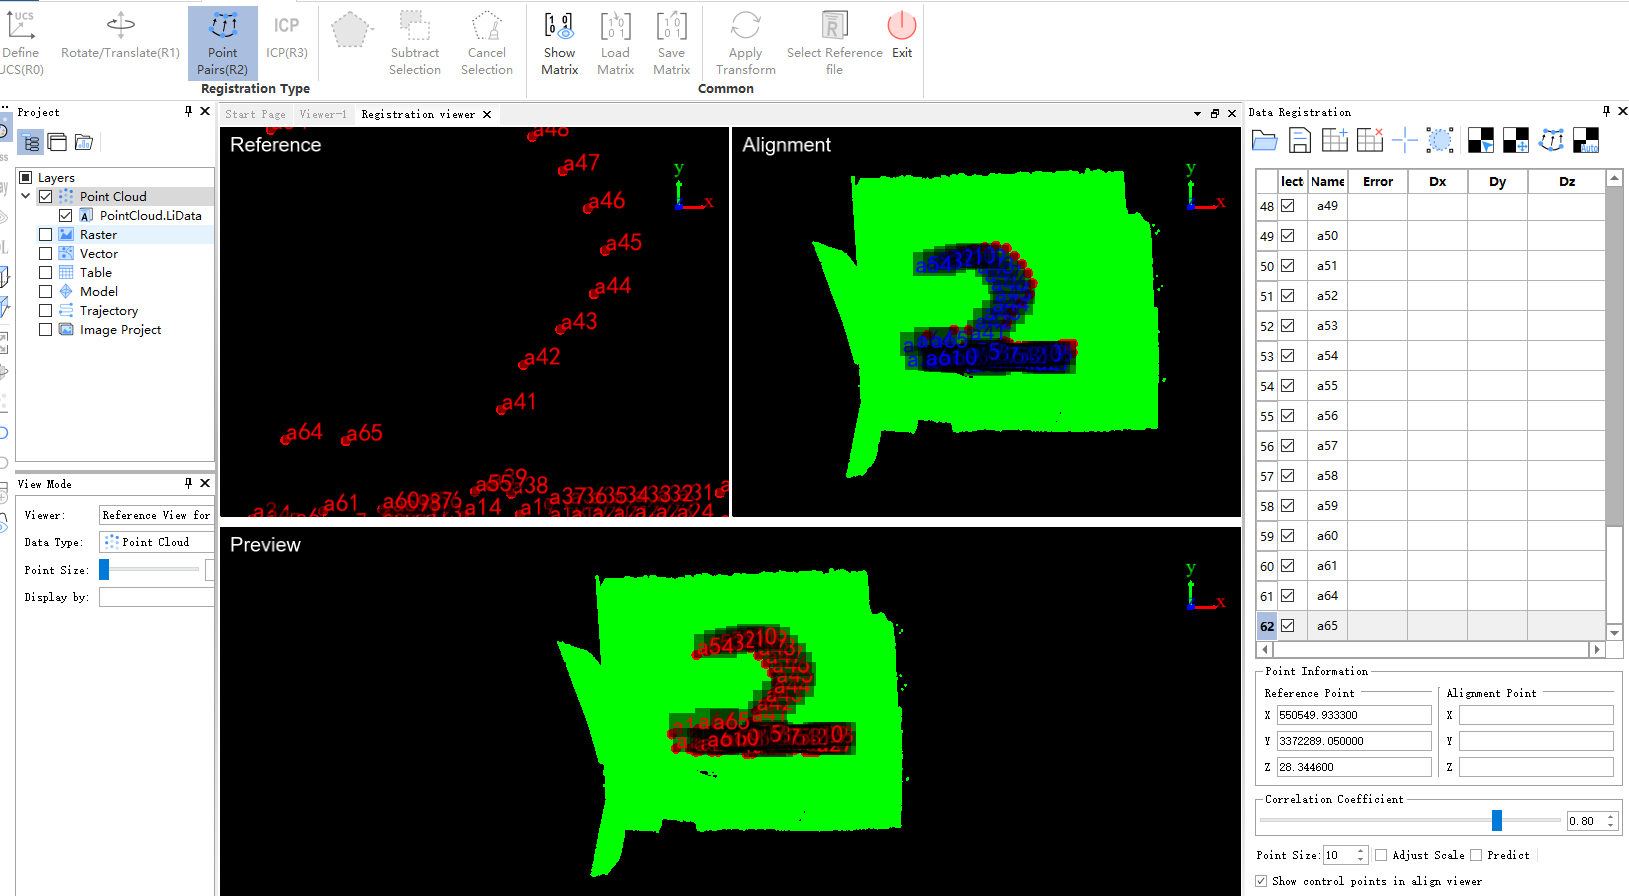
 Load Control Points. Control point information is displayed in both the reference and registration windows. Users can toggle the display of control points in the registration window. Select the corresponding control points in the table and choose corresponding points in the registration window. These corresponding points are used to calculate the coordinate transformation matrix between the two datasets for coordinate correction. By selecting point pairs, users can view the residuals between the datasets in the corresponding point pairs list.
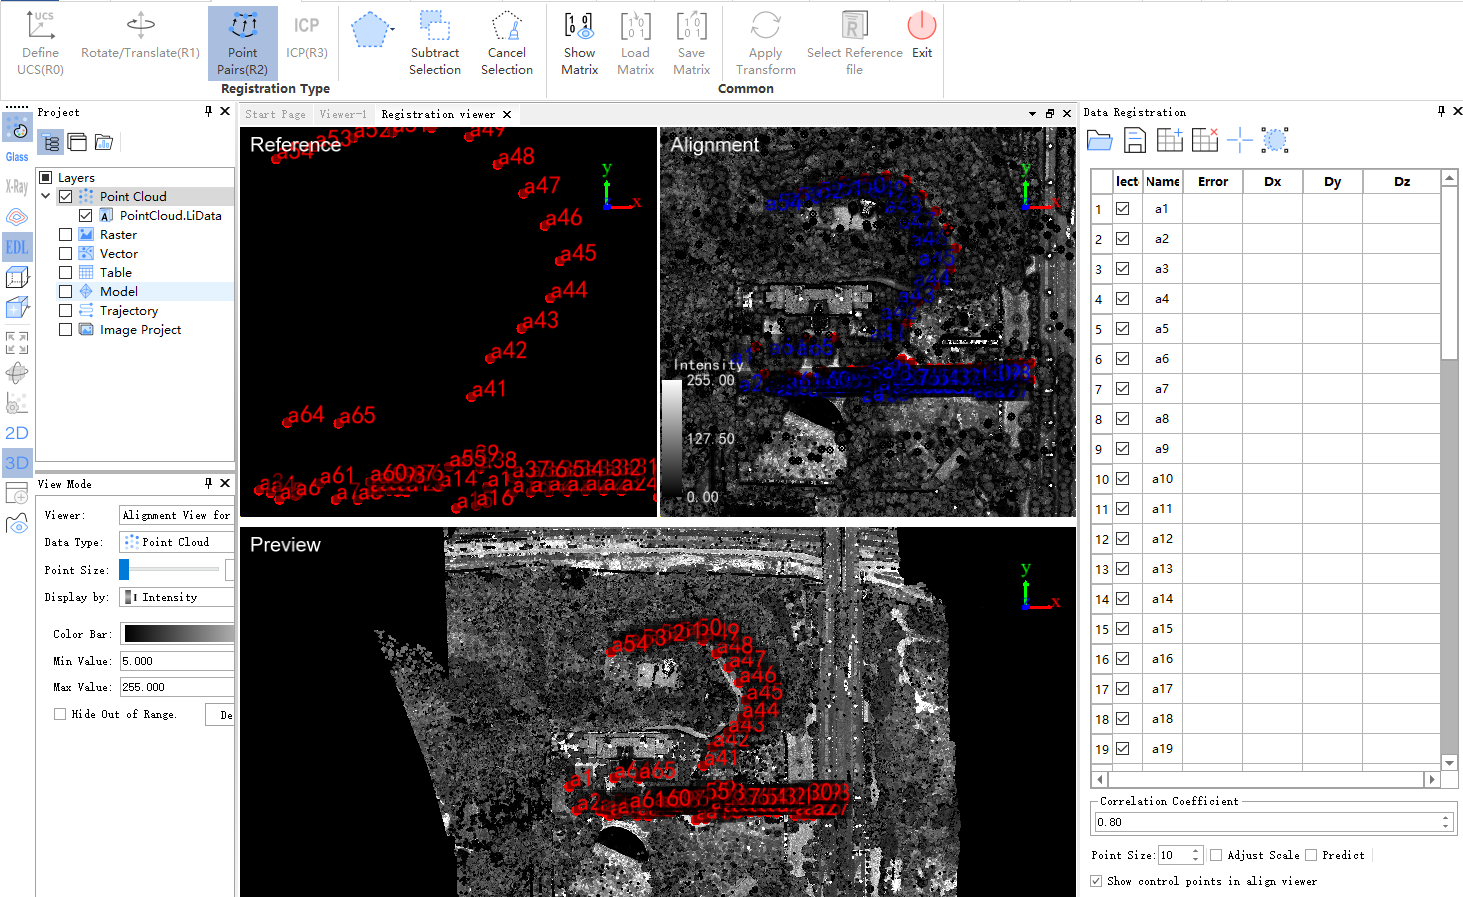
The other operations are the same as the point pairs registration steps using reference files.
If the "Use GCP Targets" option is checked, target recognition functionality is enabled.

In the lower toolbar, the buttons from left to right are Point Size, Adjust Scale, Predict.
Point Size: The size of the selected points in the window. Adjust Scale (default is "unchecked"): If the scales between the datasets are different, this option should be checked. If unchecked, the point clouds are considered to undergo a rigid transformation, and the calculated rotation matrix will not include a scaling factor. If checked, the rotation matrix will include a scaling factor. Predict (default is "unchecked"): Check this box and after selecting more than three pairs of corresponding points, the corresponding point in the reference window can be predicted after selecting the corresponding point in the registration window.