 . Or delete imported LiTin
data by clicking
. Or delete imported LiTin
data by clicking  . Or clear all the imported data by clicking
 .
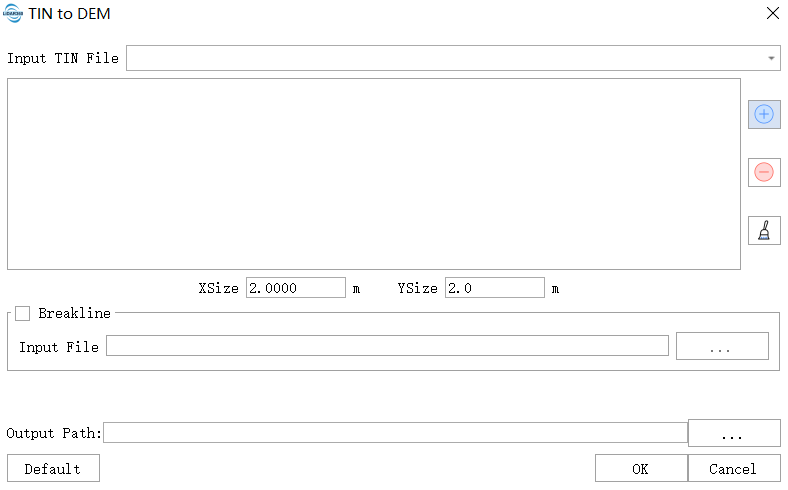
- **XSize(m)(default value is "2.0")**:The XSize of the grid to generate the DEM.
- **YSize(m)(default value is "2.0")**:The YSize of the grid to generate the DEM.
- **Import Breakline(optional)**:Import the breakline file and add the multi-segment lines in the file as soft breakline to TIN.
- **Output path**:The path where the generated DEM file to be saved.
- **Default Value**: Click this button to restore all default parameters.
.
- **XSize(m)(default value is "2.0")**:The XSize of the grid to generate the DEM.
- **YSize(m)(default value is "2.0")**:The YSize of the grid to generate the DEM.
- **Import Breakline(optional)**:Import the breakline file and add the multi-segment lines in the file as soft breakline to TIN.
- **Output path**:The path where the generated DEM file to be saved.
- **Default Value**: Click this button to restore all default parameters.