## Tree Species Identification ##
### Function Description ###
The tree species identification superimposes the point cloud and seed points according to the panoramic photos, determines the tree type and records it in the corresponding seed point file.
>Note: The point cloud must be the original point cloud and cannot be the normalized point cloud, and the elevation of the seed point file cannot be the normalized elevation.
### Usage###
Load the point cloud data to be edited into the window, and use this window as the active window, then open the panorama window, and the panorama photo will be superimposed to display the point cloud and seed points, and determine the tree species corresponding to each seed point.
Click *Foundation Forestry>Tree Species Identification*, and the tree species editing tool bar will appear in the current active window.
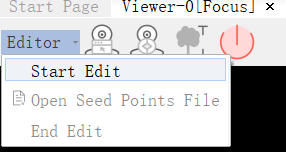
Tree species ID editing tool bar, from left to right: start/end editing, panorama, selection frame, single tree attribute window switch, exit.
### Start/End Editing ###
Click *Edit > Start Editing*
Select the data to be edited, click "OK", other functions of the tree species identification editing tool bar will become available, a single tree property window will pop up at the bottom of the window, and a dialog box for loading panorama will pop up at the same time.
During editing, selected data cannot be removed from the window. After editing, click End Editing to end the editing.
### Load seed point file ###
Click *Edit > Load Seed Point File*
Select the seed point file data to be loaded, the seed point file loading window will pop up, determine the attributes of each column of the seed point, click Apply, the seed point data will be displayed in the singular attribute window, and will be added to the point cloud window at the same time.
During editing, selected data cannot be removed from the window. After editing, click End Editing to end the editing.
### Panoramic window ###
Function description
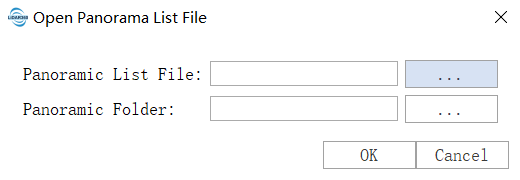
Click the *panorama window* button to open the panorama window, and a dialog box for loading panorama files will pop up. By default, the point cloud of the main window will be added and displayed, and the panorama toolbar will appear above the panorama window. From left to right, they are: previous frame, next frame Frame, panorama roaming, point cloud display range, point cloud transparency.
### select frame ###
Function Description

Click the *Select Frame* button, use the mouse to pick up the point cloud in the point cloud window, and the panorama will automatically jump to the panorama photo closest to the pick-up position.

Click the *Single Tree Property Window Switch* button to control whether the single wood property window is displayed.

Click the *Exit* button to exit the tree species identification module.

Click the *Previous Frame* button, and the panorama jumps to the previous frame.

Click the *next frame* button, and the panorama jumps to the next frame.

Click the *Auto Roam* button, the panorama will browse all the next frames from the current frame according to a certain time interval until the last one Frame stop, or click the *Auto Roam* button again to stop roaming.
Click *Only display selected seed points* button, the panorama window will only display the selected seed points in the single tree attribute measurement window , the other seed points are hidden.